前言
当使用Django执行脚本的时候,经常遇到一种情况:跳转到某个url,结果是先在后台执行一个时间较长的脚本,然后才能打开这个url页面,这样用户体验就很不好。
比如说像这样的views.py配置:
1
2
3
4
5
6
7
8
9
10
11
12
13
14
15
16
17
18
19
20
21
22
23
24
25
#使用ansible执行远程命令
def run_command(request):
command = "ansible all -i /root/.ssh/hosts -m shell -a 'echo 'worinixianren' >> /tmp/xianren.txt'" #设定ansible远程命令
if request.method == 'POST':
id = request.POST.getlist("ecs") #通过html来获取id
num = []
num.append(len(id)) #传递参数,给下一个页面用的
name = [] #传递参数,给下一个页面用的
db = pymysql.connect("阿里云数据库","数据库账号","数据库密码","databases名") #根据上面获得的id去数据库里得到对应的内网IP
cursor = db.cursor()
with open('/root/.ssh/hosts','w') as f:
for i in id:
sql = 'select * from createyaml_ecs where name = "'+ i + '";'
cursor.execute(sql)
ip = cursor.fetchall()[0][3]
cursor.execute(sql)
name.append(cursor.fetchall()[0][1])
f.write(ip+" ansible_ssh_user=root"+"\n") #将得到的内网IP写入到一个文件里
db.close() #关闭数据库
child = subprocess.Popen(command,stdout=subprocess.PIPE, stderr=subprocess.PIPE,shell=True) #执行ansible命令
stdout, stderr = child.communicate()
return render(request,'run_command.html',{'data':num[0],'name':name}) #将内容反馈到html页面里
else:
return render(request,'homepage.html')
像上面这段代码,要看到run_command.html页面就要先把整个ansible部署的脚本全跑完,如果是几百台机器批量操作的脚本,那就要等到海枯石烂水倒流。那遇到这样的情况怎么解决呢?根据不同的请求,有不同的对策:
- 单纯的后台跑一个脚本,那么就可以使用
Celery; - 在后台跑脚本的同时,还需要不断的向后台发送请求(比如微信上的茶叶妹聊天机器人),那么就要使用
Channels;
Celery原理部分和配置定时任务就不多说了,文末的参考资料里有网站,这里主要说的是如何配置Celery。
环境交代
存储后端:阿里云redis(需要支持evalsha命令,如果不支持,去控制台升级小版本即可)
Python:3.6.5
Django:2.1.1
django-celery:3.2.2,安装方法:pip install django-celery
celery-with-redis:3.0,安装方法pip install celery-with-redis
celery:3.1.26.post2
具体配置
首先配置setting.py,全文最后添加这样几句话:
1
2
3
4
5
6
7
8
9
10
11
12
13
14
#celery配置信息
#celery中间人 redis://:redis密码@redis服务所在的ip地址:端口/数据库号,我用的是254号
#channels配置redis也是这样配置,如果没有密码,就可以把':redis密码@'省略
BROKER_URL = 'redis://:redis密码@阿里云redis地址:6379/254'
#celery结果返回,可用于跟踪结果
CELERY_RESULT_BACKEND = 'redis://:redis密码@阿里云redis地址:6379/254'
#celery内容等消息的格式设置
CELERY_ACCEPT_CONTENT = ['application/json',]
CELERY_TASK_SERIALIZER = 'json'
CELERY_RESULT_SERIALIZER = 'json'
#celery时区设置,使用settings中TIME_ZONE同样的时区
CELERY_TIMEZONE = TIME_ZONE
在setting.py同级的文件夹里创建celery.py,内容如下:
1
2
3
4
5
6
7
8
9
10
11
12
13
14
15
16
17
18
19
20
21
22
#coding:utf-8
from __future__ import absolute_import, unicode_literals
from celery import Celery
from django.conf import settings
import os
#获取当前文件夹名,即为该Django的项目名
project_name = os.path.split(os.path.abspath('.'))[-1]
project_settings = '%s.settings' % project_name
#设置环境变量
os.environ.setdefault('DJANGO_SETTINGS_MODULE', project_settings)
#实例化Celery
app = Celery(project_name)
#使用django的settings文件配置celery
app.config_from_object('django.conf:settings')
#Celery加载所有注册的应用
app.autodiscover_tasks(lambda: settings.INSTALLED_APPS)
还是在同样的文件夹里,编辑__init__.py:
1
2
3
4
5
#coding:utf-8
from __future__ import absolute_import, unicode_literals
#引入celery实例对象
from .celery import app as celery_app
然后在app(具体应用的文件夹里),创建一个叫tasks.py,这里面就是需要在后台执行的具体脚本:
1
2
3
4
5
6
7
8
9
10
11
#coding:utf-8
from celery.decorators import task
import subprocess
#在原有的方法上加上celery装饰器task
#ansible批量部署命令
def run_ansible():
command = "ansible all -i /root/.ssh/hosts -m shell -a 'echo 'worinixianren' >> /tmp/xianren.txt'" #设定命令
child = subprocess.Popen(command,stdout=subprocess.PIPE, stderr=subprocess.PIPE,shell=True)
stdout, stderr = child.communicate()
print ("success!!!") #执行成功!
保存退出之后,修改原有的views.py,把原来涉及脚本的字段删除,改成:
1
2
3
4
5
6
7
8
9
10
11
12
13
14
15
16
17
18
19
20
21
22
def run_command(request):
if request.method == 'POST':
id = request.POST.getlist("ecs")
num = []
num.append(len(id)) #传递参数,给下一个页面用的
name = []
db = pymysql.connect("阿里云数据库","数据库账号","数据库密码","databases名")
cursor = db.cursor()
with open('/root/.ssh/hosts','w') as f:
for i in id:
sql = 'select * from createyaml_ecs where name = "'+ i + '";'
cursor.execute(sql)
ip = cursor.fetchall()[0][3]
cursor.execute(sql)
name.append(cursor.fetchall()[0][1])
f.write(ip+" ansible_ssh_user=root"+"\n")
db.close()
run_ansible.delay() #celery异步执行后台ansible程序,使用delay函数
return render(request,'run_command.html',{'data':num[0],'name':name})
else:
return render(request,'homepage.html')
返回到manage.py所在的目录,先正常启动django,然后再/usr/local/python3/bin/celery -A project名称 worker -l info启动celery,如图: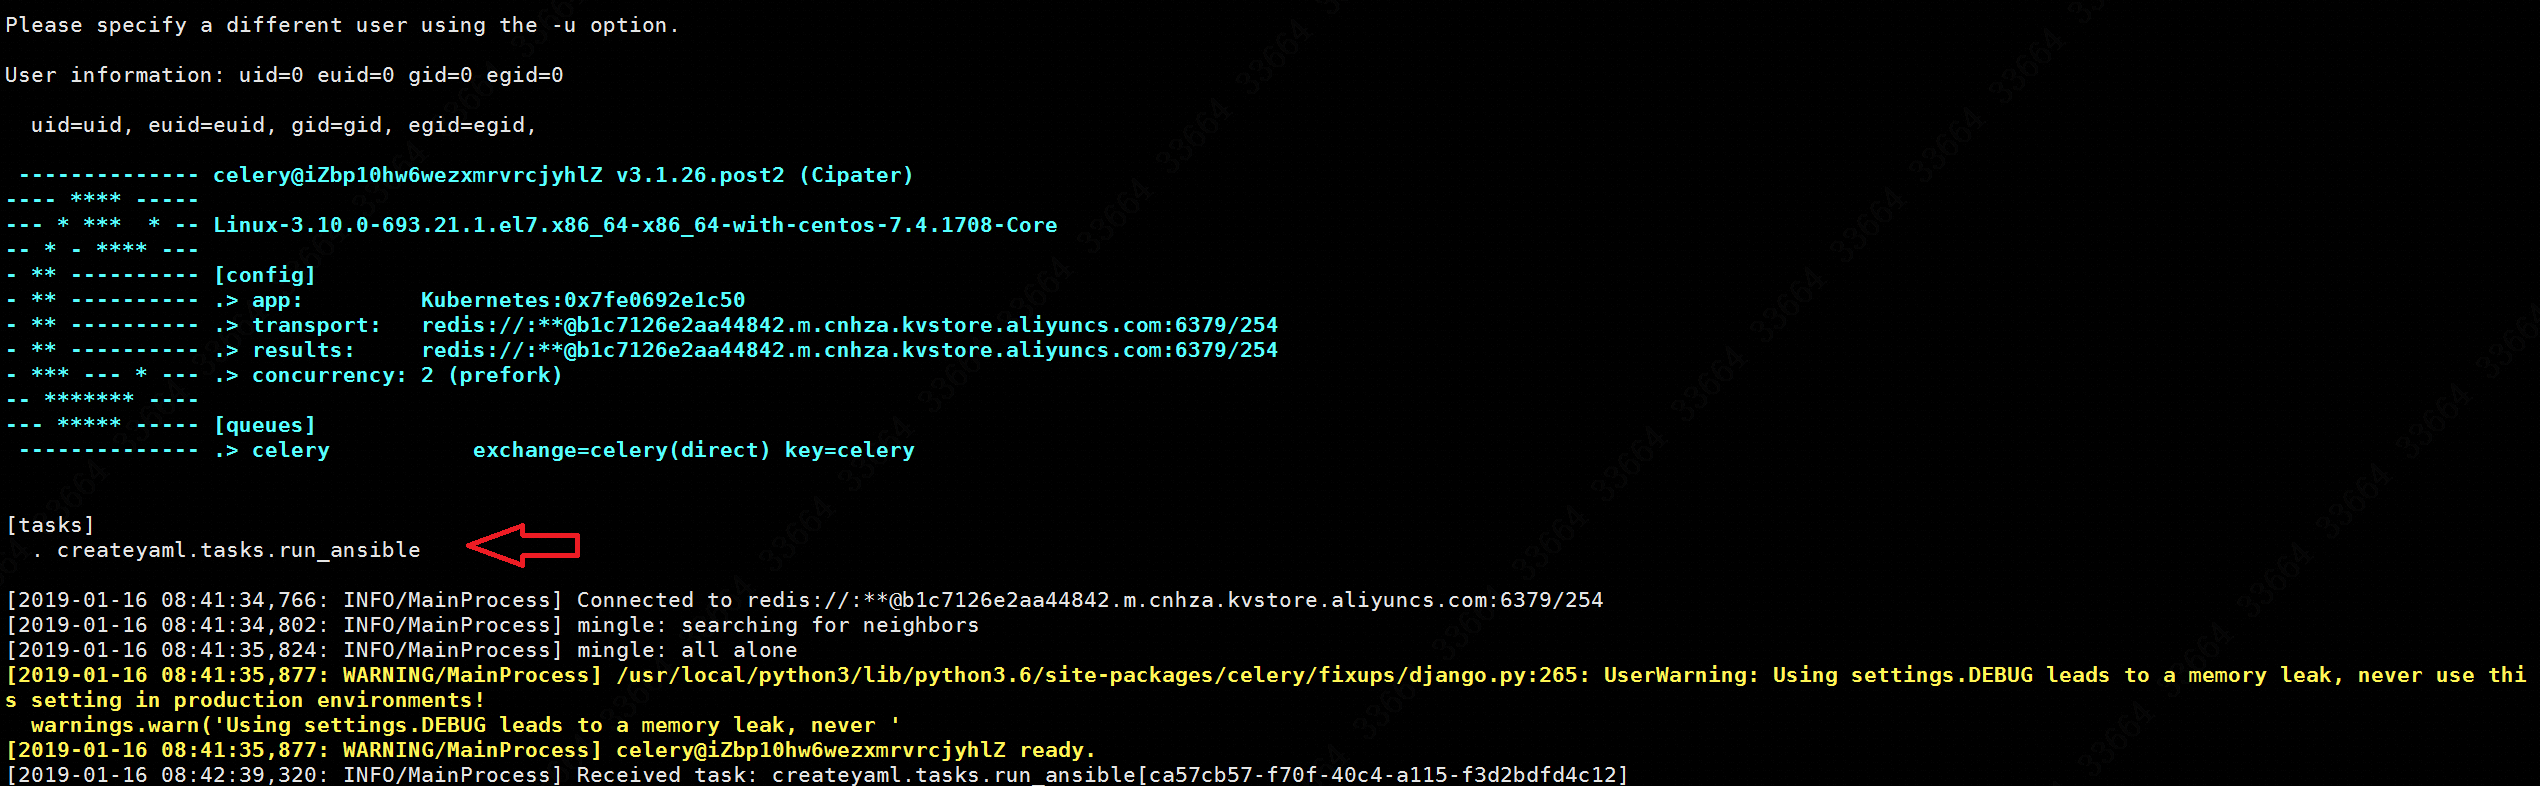
看到tasks.py已经成功被celery使用了,然后在页面上去执行原本的命令,就会看到celery页面有刷新:
此时再去redis里查看一下存储的效果: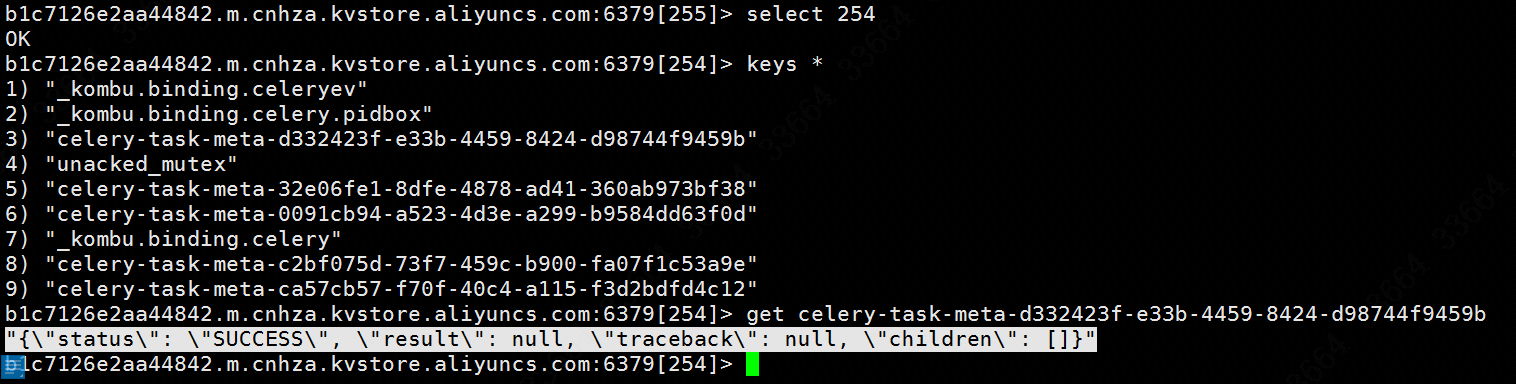
可见tasks执行的状态已经被保存到了redis里。但是上面我们是在前台页面启动celery,如果想把celery作为一个后台守护进程,那么命令语句如下:
1
/usr/local/python3/bin/celery multi start worker -A project名称 -l info
效果如图: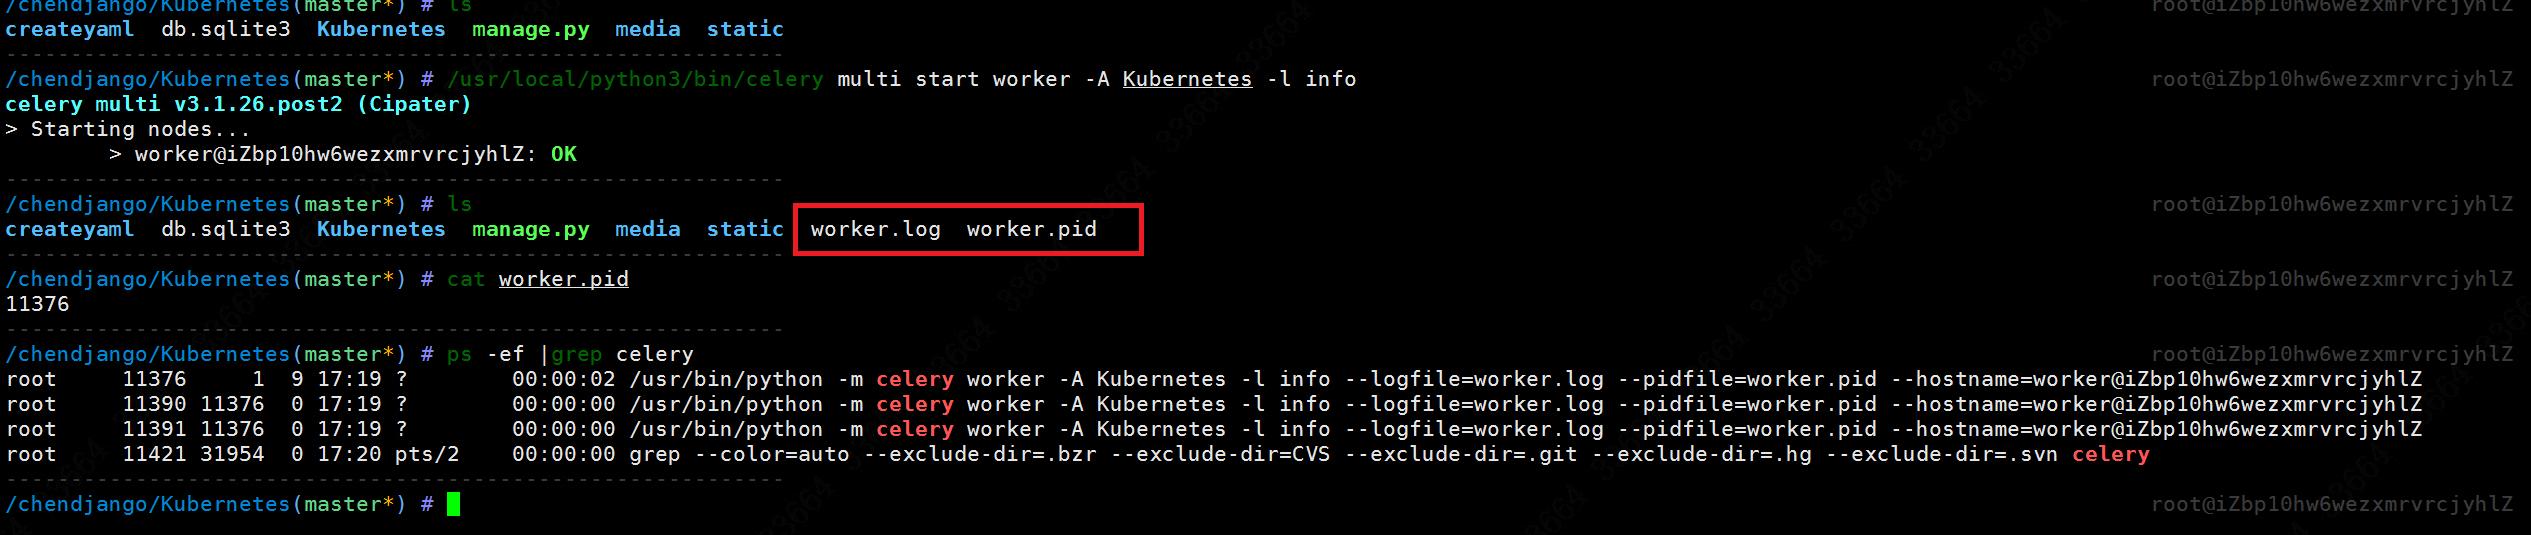
停止或重启将上面的start换为stop或restart即可。
补充
如果tasks.py内容变化了,需要重启celery才能生效。
如果在启动celery的时候,日志有写UserWarning: Using settings.DEBUG leads to a memory leak, never use this setting in production environments! warnings.warn('Using settings.DEBUG leads to a memory leak, never ',那么就在settings.py里把DEBUG = True改成DEBUG = False即可。
查看redis有几个库的命令:config get databases。
参考资料
http://yshblog.com/blog/163 (对照代码做一遍就更有体会了)
https://www.cnblogs.com/wdliu/p/9517535.html (原理以及如何配置定时任务)
https://www.cnblogs.com/wdliu/p/9530219.html
http://docs.celeryproject.org/en/latest/getting-started/brokers/redis.html